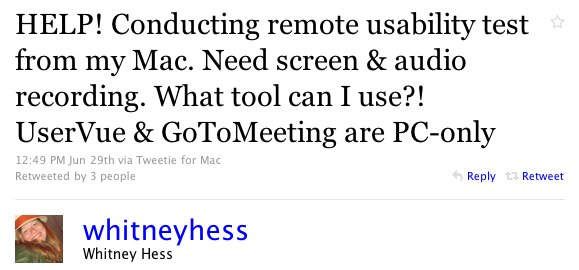
When Whitney Hess tweeted this week about needing help with a remote usability test, we jumped on the opportunity to help. “Simple,” we said! “That’s what we do everyday!”
Well, not exactly simple but do-able without too much effort.
Here’s what Whitney told us she needed:
- A way to call a user in her home
- Have that user share her desktop (Mac or PC)
- Ask the user a few questions, and observe what the user does
- Record both the audio and video in a single file — on a Mac
- Take notes all the while
- Oh, and make it low cost while you’re at it
And here’s what we told Whitney:
First, you’re going to need the follow “equipment”:
- A laptop and extra monitor
- A USB headset
- A set of headphones
- GoToMeeting (GTM)
- iSHowU HD
- Optional: An Fiio amp to boost the audio in the headphones
Then, setup GoToMeeting to manage the screensharing and audio. We keep a persistent meeting ID in use, which we bookmark on a landing page. This landing page is where we go to launch the meeting (as the organizer), where our clients connect, and where we direct our users. GoToMeeting doesn’t use a browser plugin; instead they use Java or ActiveX to deliver an application that runs at the OS level. It works on both Macs and PCs, although Mac users can only share their primary desktop.
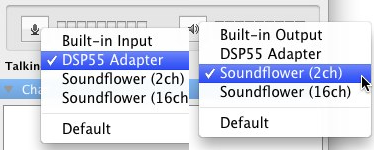
These are the settings you want to use in GTM:
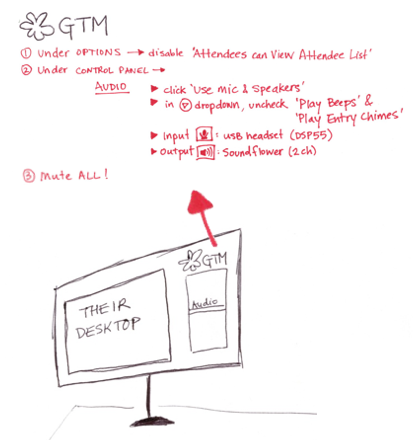
Basically, you want to disable a bunch of features to make it feel like it’s just you and the user in the meeting. This includes disabling the Attendee List and turning off Entry/Exit beeps. Unfortunately, GTM always announces the number of callers on the line when the user connects either by phone or mic & speakers.
Pay attention to the Audio Output setting: you have to hijack the audio from GTM and send it to iShowU HD to record. In fact, you’ll need to install that driver (Soundflower 2ch) to allow you to record audio from native applications.
“MUTE ALL” is also this wonderful trick we learned from the good folks at GTM. If you do it the very first thing, then everyone who joins the meeting afterwards will come in muted by default! This lets you rest assured that any clients who connect late won’t be heard by the participant.
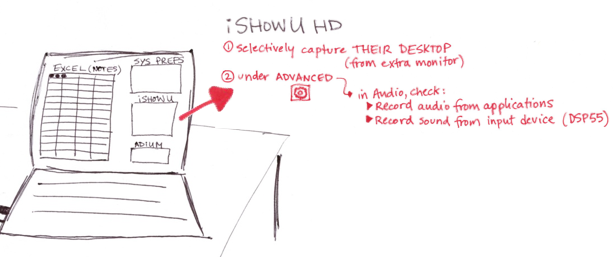
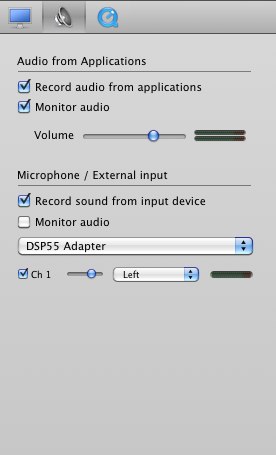
Next, use iShowU HD to record just a portion of your screen. You can use pretty standard settings for video capture, but make sure you choose the correct Audio settings: turn on ‘Audio from Applications’ to capture that audio stream from GTM that we hijacked and the Mic Input from your Headset (DSP55).
This is what the Advanced -> Audio panel should look like:
Finally, make sure your Mac System Preferences are set properly. This is used to make sure you can hear and communicate during the call! Set the output to your headphones, and the input to your USB headset.
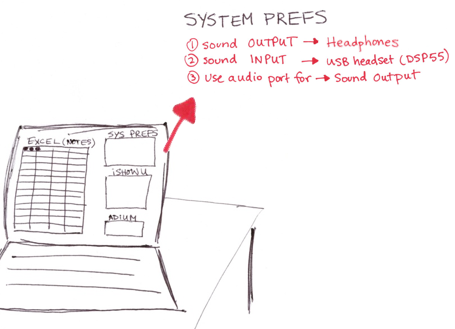
Here’s what the settings look like:
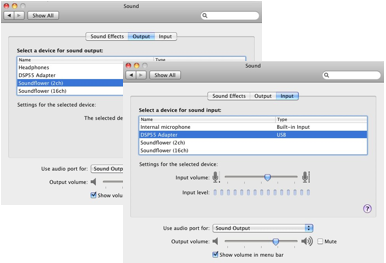
Good luck getting things set up! This actually works brilliantly — but we’re always on the lookout for new and better solutions. Let us know what you’ve found that works for you!
